
To upgrade sway bars at home, you’ll need tools like a jack, jack stands, socket set, wrenches, screwdrivers, a torque wrench, and penetrating oil. First, lift the vehicle safely, remove the wheels, and disconnect the end links from the suspension. Compare the new sway bar to the old one, then install it by attaching to mounting points and tightening hardware to spec. Once done, double-check all fasteners and go for a test drive—more tips await if you keep exploring.
Key Takeaways
- Gather essential tools: jack, jack stands, socket set, wrenches, screwdrivers, torque wrench, and penetrating oil.
- Safely lift and support the vehicle on a flat surface, then remove the wheels for access.
- Disconnect end links from the sway bar and suspension components, noting hardware placement.
- Install the new sway bar, attach end links, and tighten all bolts to specified torque.
- Reassemble wheels, lower the vehicle, and perform a test drive to ensure proper handling and secure hardware.
Upgrading your sway bars at home is a straightforward way to improve your vehicle’s handling and stability. Before diving into the process, it’s helpful to understand the different sway bar types available. There are mainly two: anti-roll bars and stabilizer bars, with variations like adjustable sway bars that let you fine-tune your suspension. Knowing the type of sway bar you need depends on your vehicle and driving style. For example, a stiffer bar reduces body roll during cornering but can make your ride harsher, while a softer bar offers more comfort. Sometimes, common issues with stock sway bars include excessive body roll, poor responsiveness, or uneven wear, which can be addressed by upgrading to a more suitable sway bar.
Upgrading sway bars enhances handling, reduces body roll, and improves vehicle stability for a smoother ride.
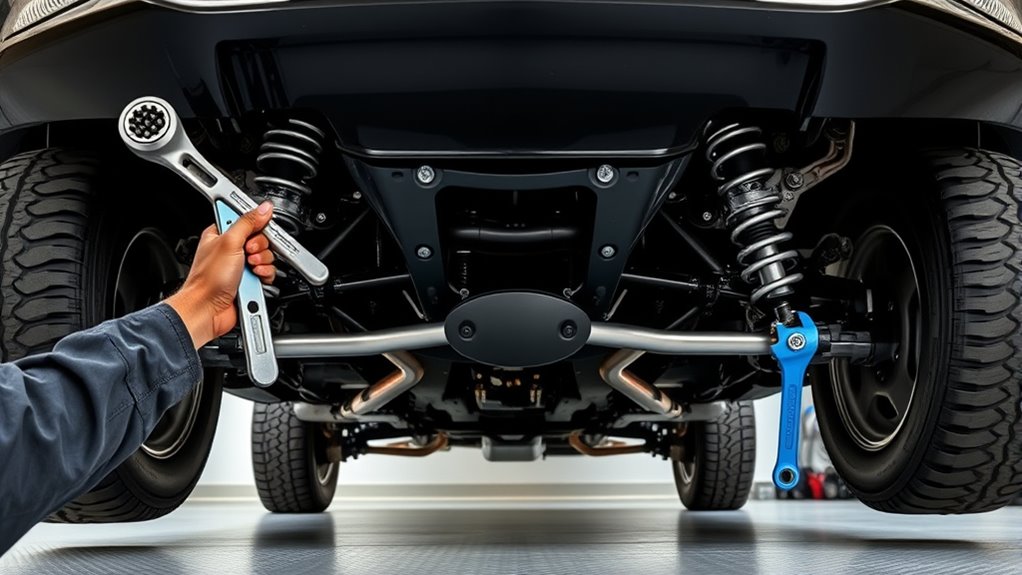
When you’re ready to get started, gather the essential tools: a jack, jack stands, a socket set, wrenches, screwdrivers, and potentially a torque wrench for precise tightening. You might also need penetrating oil to loosen rusted or stubborn bolts, especially if your vehicle has been sitting for a while. Before lifting your car, ensure it’s on a flat surface, and engage the parking brake for safety. Use the jack to lift the vehicle and secure it with jack stands. Always double-check stability before crawling underneath.
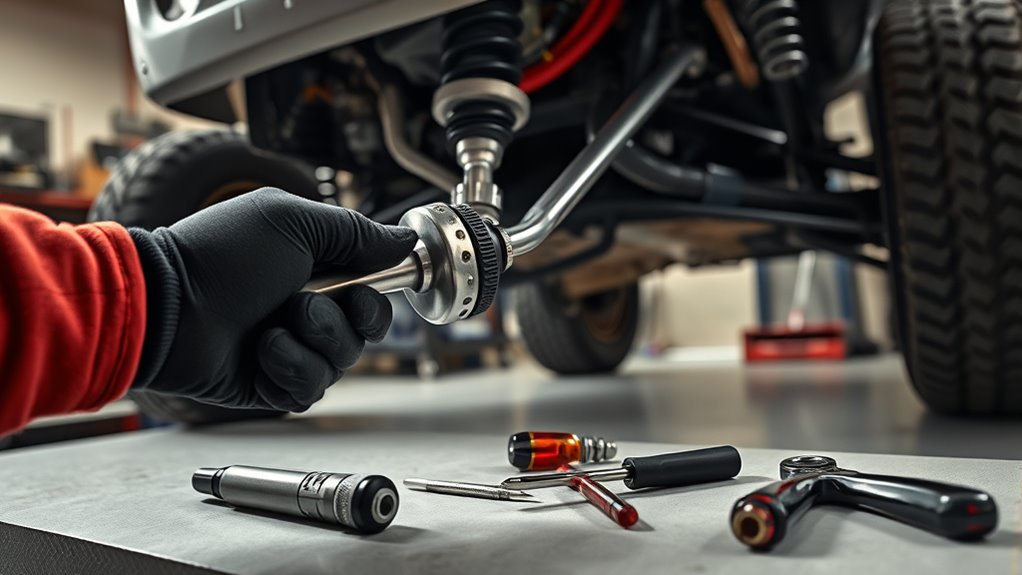
Begin by removing the wheels to access the sway bar and its mounting points. Locate the sway bar end links, brackets, and bushings. Using your socket set and wrenches, carefully disconnect the end links from the sway bar and the suspension components. Keep track of all hardware, as some bolts may be rusted or stripped. Once the old sway bar is free, compare it with your new one to confirm compatibility, especially if you’re opting for an adjustable or aftermarket sway bar.
Installing the new sway bar involves attaching it to the original mounting points and securing it with the provided hardware. Make sure to tighten all bolts to the manufacturer’s specified torque to prevent any issues down the line. Pay special attention to the end links; they need to be snug but not overly tight, as this can affect movement and noise. After installation, reattach the wheels, lower the vehicle, and perform a test drive, listening for any unusual noises or handling problems.
Frequently Asked Questions
Can I Upgrade Sway Bars on Any Vehicle Model?
You can upgrade sway bars on many vehicle models, but vehicle compatibility varies. Check your car’s make, model, and year to verify the new sway bars fit properly. Keep in mind upgrade limitations, such as size restrictions or suspension compatibility, which may affect your options. Always research specific parts and consult your vehicle’s manual or a professional mechanic to confirm the upgrade will work safely and effectively on your vehicle.
How Long Does the Sway Bar Upgrade Process Typically Take?
Like a seasoned chef perfecting a new recipe, your sway bar upgrade typically takes 1 to 3 hours, depending on your skill level. If you’re comfortable with basic tools and procedures, you can expect a quicker installation duration. However, if you’re new to car modifications, it might take a bit longer. With patience and some technical know-how, you’ll have your vehicle handling better in no time.
Will Upgrading Sway Bars Improve My Vehicle’s Fuel Efficiency?
Upgrading sway bars can improve your vehicle’s handling and stability, but it doesn’t considerably boost fuel efficiency. Many fuel efficiency myths suggest upgrades always save gas, but sway bar benefits mainly include better cornering and reduced body roll. If you’re looking to improve fuel economy, focus on tire pressure, engine maintenance, and driving habits. Upgrading sway bars is a great handling upgrade, but don’t expect major fuel savings from it.
Are There Any Safety Risks Associated With Upgrading Sway Bars?
Upgrading sway bars can pose safety hazards if you don’t take proper precautions. For example, if you don’t securely tighten the components, the sway bar could come loose while driving, risking accidents. Always wear safety gear, follow manufacturer instructions, and double-check your work. Proper precautions minimize risks like injury or damage, ensuring your upgrade improves handling without compromising safety. Stay cautious and attentive during installation.
Do I Need to Recalibrate Other Suspension Components After Upgrading?
You typically don’t need to recalibrate other suspension components after upgrading sway bars, but it’s smart to check your suspension alignment afterward. Upgrading sway bars can affect handling and balance, so verify your shock absorber compatibility remains intact. If you notice uneven tire wear or handling issues, consider a professional suspension alignment to optimize performance and safety. Proper calibration ensures your vehicle responds correctly to the new sway bar setup.
Conclusion
So, there you have it—upgrading sway bars at home is practically a walk in the park, if that park is filled with grease, torque wrenches, and a dash of frustration. Just remember, nothing beats the thrill of turning a simple upgrade into a full-blown automotive adventure. Who knew that tightening bolts could be so exhilarating? Just don’t forget to double-check your work, or you might find yourself back under the car, wondering what went wrong. Happy wrenching!