To swap your MQB for an IS38 turbo, you’ll need the turbo itself, a compatible intake pipe, an upgraded intercooler (optional), a suitable downpipe, and a boost control solenoid or actuator. Gather tools like an OBD-II scanner, ECU tuning software, and wiring for coding. First, verify parts compatibility, install the turbo, then adjust ECU parameters for boost control, spool, and fueling. If you continue, you’ll find detailed steps for a smooth upgrade process.
Key Takeaways
- Gather compatible IS38 turbo, intake pipe, intercooler (optional), downpipe, and boost control components.
- Install parts following proper procedures, ensuring compatibility with MQB platform.
- Connect OBD-II scanner and upload the stock ECU map to establish a baseline.
- Adjust ECU boost control parameters, target boost levels, and wastegate duty cycle via tuning software.
- Use data logs to verify intake pressure, fuel trims, and fine-tune for optimal spool, response, and drivability.
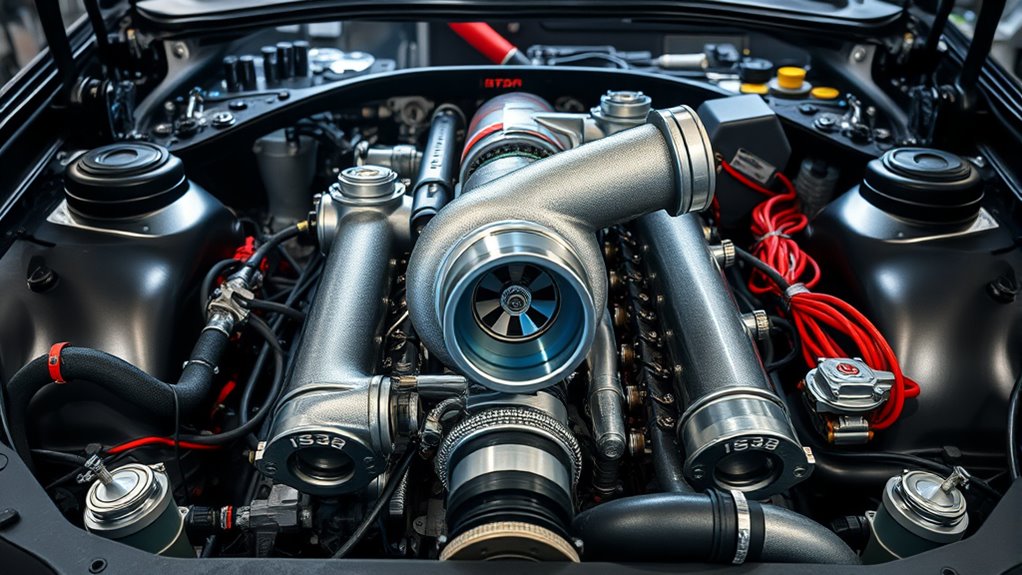
Considering upgrading your MQB platform with an IS38 turbo? You’re about to unlock significant performance gains, but it’s essential to understand the tuning adjustments involved to maximize your upgrade. The IS38 turbo is a popular choice for enthusiasts seeking more power, but it requires careful tuning to ensure everything runs smoothly. One of the crucial aspects is fine-tuning the boost control system. Proper boost control ensures your engine receives the right amount of pressure without risking damage or creating inconsistent power delivery. Before diving into the coding steps, make sure you have a comprehensive parts list. You’ll need the IS38 turbo itself, a compatible intake pipe, upgraded intercooler if desired, and a suitable downpipe. Additionally, you should have a quality boost control solenoid or actuator, depending on your setup, to help manage boost levels effectively. Don’t forget to gather the necessary tools, such as an OBD-II scanner, tuning software compatible with your ECU, and safety equipment to protect your vehicle during the process.
Once you’ve assembled your parts and prepared your workspace, the next step involves coding adjustments. The goal here is to modify the ECU parameters to accommodate the new turbo. You’ll start by connecting your OBD-II interface to your vehicle and opening your tuning software. Carefully upload the stock map, then locate the parameters related to boost control, wastegate duty cycle, and fuel mappings. Adjust the boost target settings to match the capabilities of your IS38 turbo, ensuring you don’t push the system beyond safe limits. Tuning adjustments should focus on optimizing spool time, peak boost pressure, and maintaining a smooth power curve. Fine-tuning boost control is vital because it prevents overboosting, which can cause engine damage, and underboosting, which limits performance. Use data logs during the test runs to verify your adjustments, making incremental changes to improve throttle response and overall drivability. Always monitor parameters like intake pressure, fuel trims, and knock sensors throughout this process to prevent potential issues. Additionally, understanding the GMC tuning fundamentals can help you better interpret engine data and optimize your setup for both safety and performance.
Frequently Asked Questions
What Are Common Issues During the Turbo Swap Process?
During a turbo swap, you might face common issues like increased turbo lag or inconsistent boost pressure. These problems often stem from improper installation, incorrect tuning, or faulty connections. You should double-check all fittings, verify the turbo is properly aligned, and update your ECU calibration. Addressing these issues promptly helps optimize boost pressure, reduce lag, and ensure your new turbo performs reliably.
Can I Perform the Swap Without Professional Tools?
You can perform the turbo swap without professional tools if you have basic DIY tools and some mechanical skills. However, keep in mind that using non-specialized tools might affect the quality of your work and could lead to warranty concerns if issues arise later. It’s essential to follow proper procedures, stay cautious, and understand that some tasks may require specific tools for safety and precision.
How Long Does the Entire Turbo Upgrade Typically Take?
Imagine unleashing a beast beneath your hood—that’s what a turbo upgrade promises. Typically, it takes about 4 to 8 hours, depending on your experience and tools. Follow installation tips carefully, and you’ll unlock impressive performance gains. Rushing can cause headaches, so take your time. With patience and precision, you’ll enjoy the thrill of the upgrade, feeling your car’s new power and responsiveness come alive on every drive.
Are There Specific Fuel Requirements for the IS38 Turbo?
You should use high-octane fuel, typically 91 or higher, to guarantee optimal performance with the IS38 turbo. Lower octane fuel can cause knocking and reduce efficiency, affecting turbo compatibility and longevity. Always check your vehicle’s manual for specific fuel recommendations. Using the right fuel octane not only protects your engine but also helps maximize the turbo’s power and durability during aggressive driving or tuning.
What Warranty Coverage Is Available After the Swap?
After your swap, warranty coverage might have limitations or exclusions, especially for modifications like installing an IS38 turbo. Manufacturers often restrict coverage for issues related to the upgraded parts, citing warranty limitations and coverage exclusions. You should check with your dealer or manufacturer to understand what’s covered and what isn’t, as remaining factory warranty might be affected. Keep records of all work to help support your warranty claims if needed.
Conclusion
Beginning this MQB IS38 turbo swap transforms your car into a symphony of power and precision. With the right parts and a careful eye on coding, you’re not just upgrading—you’re crafting a masterpiece of engineering. Remember, every bolt and byte plays a crucial role in this harmony. So, embrace the challenge with confidence, for in this journey, mastery is forged through patience, turning your vehicle into a true work of art.