
Customizing the interior of your Chevrolet C10 can transform your classic truck into a comfortable and stylish ride. Start by updating upholstery using materials from LMC Truck for a factory-fresh look. Consider DIY projects, like installing new carpet or sound deadening, to save money while personalizing your space. Don't forget about effective temperature control with insulation materials. You can also enhance aesthetics with modern touches like brushed aluminum pedals. Engaging with fellow enthusiasts can provide inspiration and tips. Keep exploring to uncover even more ideas and techniques that will take your C10's interior to the next level.
Key Takeaways
- Choose OEM-matching upholstery and components from LMC Truck for a factory-fresh interior look in your Chevrolet C10.
- DIY upholstery projects allow for personal style choices while saving money on professional services.
- Install sound deadeners like 80 mil Kill Mat to enhance noise reduction and temperature control in the cab.
- Utilize chrome sill plates and brushed aluminum trim to elevate the aesthetic appeal of your truck's interior.
- Engage with automotive communities online for inspiration, tips, and support during your customization journey.

HOMEXCEL Microfiber Cleaning Cloth 12 Pack, 12.5 x 12.5 inch Microfiber Towels for Cars, Ultra Absorbent Washing Cloth, Lint Free Streak Free Cleaning Rags for Car, Kitchen, and Window (Grey)
- High Water Absorption: Outstanding absorption for dirt and liquids
- Gentle on Surfaces: Soft fabric prevents scratches and damage
- Quick Drying: Rapidly absorbs water for streak-free drying
As an affiliate, we earn on qualifying purchases.
Understanding Upholstery Installation
When it comes to upholstery installation in your Chevrolet C10, you've got a range of options that make this a feasible DIY project. One of the key areas you'll want to focus on is the door panels. By choosing direct replacement upholstery products from a reliable catalog, you can guarantee that your new panels match OEM specifications, giving your interior a factory-fresh look.
Start your installation process by laying down sound and heat barriers to enhance comfort. Next, install the carpet, using pre-molded options with marked bolt holes for a streamlined setup.
Once you've got the flooring in place, move on to recovering the seats with covers that can be easily secured using hog rings. This method allows for a snug fit and a polished appearance.
With home installation, you can tailor the style of your C10's interior to your liking, transforming it quickly and efficiently. Plus, you won't need to hire a professional, saving you both time and money.
Exploring LMC Truck Products

Upgrading your Chevrolet C10's interior is made easy with LMC Truck products, which offer a wide range of upholstery options tailored specifically for your needs.
Their extensive catalog includes headliners, carpets, and seat covers that match OEM specifications, ensuring your truck looks fantastic. You'll find that the installation process is straightforward; I've never encountered such an easy DIY application.
The seat covers utilize hog rings for a secure fit, making it simple for anyone to transform their interior without advanced skills.
LMC Truck's direct replacement products guarantee a precise fit and authentic appearance, perfect for both restoration and customization projects.
If you want to add a modern flair to your vintage truck, their billet trim products serve as excellent enhancements. Plus, these products are cost-effective, allowing you to personalize your C10 without breaking the bank or having to rely on professional upholstery services.
Advantages of DIY Upholstery

When you tackle DIY upholstery, you save money by skipping professional services while gaining control over your truck's interior.
With options from LMC Truck, you can pick materials and styles that fit your unique taste, ensuring your Chevrolet C10 truly reflects your personality.
Plus, the straightforward installation means you don't need advanced skills, making it a practical choice for any enthusiast.
Cost-Effective Upgrades
One of the best ways to achieve cost-effective upgrades for your Chevrolet C10 is through DIY upholstery projects. By taking on the upholstery yourself, you eliminate the need for professional services, which can greatly cut down on costs associated with interior upgrades.
Additionally, this approach mirrors the principles of budget management, allowing you to allocate your funds more effectively. LMC Truck offers a thorough catalog of direct replacement upholstery products, making it easy for you to achieve a cost-effective restoration that maintains OEM specifications.
Installing sound deadeners and new carpet on your own can enhance comfort and reduce noise levels without the expense of hiring specialists. Having the ability to order parts directly from LMC Truck's catalog simplifies the process, allowing you to transform your truck's interior on a budget.
Moreover, doing the work yourself not only saves money but also gives you a sense of accomplishment. You'll have full control over the materials and techniques used, ensuring that every detail meets your standards.
With each project, you'll find that cost-effective upgrades through DIY upholstery can breathe new life into your C10, making it not just more comfortable, but also a reflection of your dedication and hard work.
Personalized Style Choices
Taking on a DIY upholstery project not only enhances your Chevrolet C10's comfort but also opens the door to personalized style choices that reflect your unique taste.
With LMC Truck's extensive catalog, you can select from a variety of colors, materials, and designs, allowing you to create an interior that truly resonates with your vision. Whether you want classic leather or vibrant fabric, the options are nearly limitless.
The installation process is straightforward and doesn't require advanced sewing skills, making it accessible for anyone enthusiastic to achieve a professional look on their own.
This means you can customize your truck without the hefty price tag of professional upholstery shops, giving you the flexibility to allocate your budget elsewhere.
Step-by-Step Installation Process

To kick off your installation, start with sound deadening techniques using products like the 80 mil Kill Mat for ideal heat and noise control.
Once you've got that laid down smoothly, you can move on to carpet installation tips that guarantee a perfect fit.
These steps will set a solid foundation for your C10's interior transformation.
Sound Deadening Application Techniques
Applying sound deadening material in your Chevrolet C10 can greatly enhance your driving experience by reducing noise and improving audio quality.
To start, I'm gonna install an 80 mil Kill Mat, which is effective for noise reduction. You'll need about 50 sq ft to cover the floor, behind the dash, and inside the doors.
Begin by cutting shapes that fit around high areas and bends, guaranteeing a smooth application without creases. Start from the center of the area and work outward. As you go, mark bolt locations by pressing down through the mat and cutting with an exacto knife for precise fitting.
Once you've laid down the material, secure it well to maintain cabin heat levels, contributing to an overall quieter driving experience.
After installation, you can expect a significant reduction in droning noise, which will enhance the sound quality of your vehicle's audio system.
Taking these steps will guarantee your classic truck not only looks good but also sounds great, making your drives much more enjoyable.
Get ready to enjoy the improved acoustics on your next ride!
Carpet Installation Tips
After enhancing your cabin's acoustics with sound deadening, it's time to focus on the finishing touch: carpet installation.
Begin by laying the carpet out in the sun for about 30 minutes. This softens the material, making it easier to work with and allowing for a better fit.
Next, route your amp and speaker wires along the transmission hump to keep them organized and separate from the carpet.
When you have the pre-molded carpet ready, check for marked bolt holes to verify easy alignment, especially when securing the front bench seat.
As you position the carpet, take care to match its contours to the cab for a snug and aesthetically pleasing fit.
Once installed, trim any excess material as necessary.
Effective Temperature Control Tips

Maintaining a comfortable interior temperature in your Chevrolet C10 is vital for an enjoyable driving experience. To achieve this, consider these effective temperature control tips.
First, install a heat shield within the cab. It requires proper trimming and adhesive application for a secure fit, acting as an effective barrier against heat. This greatly enhances your comfort during warmer climates.
Additionally, guaranteeing proper ventilation can help combat humidity and improve air circulation, making your ride even more pleasant. For more on cold medications overview, understanding how to manage symptoms effectively can also translate to managing discomfort in different environments.
Next, layering sound and heat barriers can improve insulation. Materials like 80 mil Kill Mat not only reduce noise but also help maintain cabin heat levels. By integrating these materials and confirming a tight fit, you're bolstering the truck's overall temperature regulation.
Regular checks for gaps or unsealed areas are essential. If you spot any, addressing them promptly will enhance the effectiveness of your temperature control measures. This diligence guarantees that your cabin remains cozy, regardless of the weather outside.
Lastly, don't forget to install quality carpet, as it further aids in insulation. By following these tips, you'll create a more enjoyable driving environment.
Sound Deadening Techniques

A quieter ride can transform your driving experience in a Chevrolet C10, making sound deadening techniques vital for enhancing comfort. One effective method is installing an 80 mil Kill Mat sound deadener, which covers approximately 50 sq ft. This material greatly reduces cabin noise while helping to maintain heat levels inside your truck.
To start, position the sound deadener from the center of the area and work outward. This approach prevents creases and guarantees a smooth application. When you encounter high areas and bends, cut shapes to achieve a snug fit around obstacles.
For precise fitment, press down on the mat to mark bolt locations, and then use an exacto knife to cut around them, avoiding any interference with hardware.
Apply the sound deadener to various areas like the floor, behind the dash, and inside the doors for thorough noise reduction.
Once you've installed these sound deadening techniques, you'll notice a marked reduction in droning noise, enhancing your driving experience—especially if you've added a brand new aftermarket exhaust system. Enjoy the quieter, more comfortable ride!
Preparing and Installing Carpet
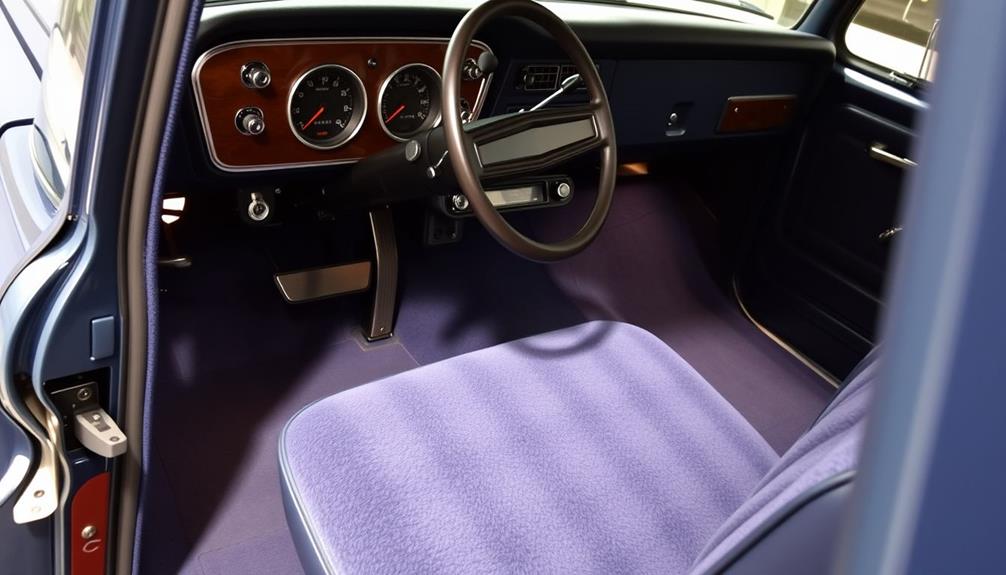
Installing new carpet in your Chevrolet C10 can greatly enhance its interior aesthetics and comfort. To get started, lay the new carpet out in the sun for about 30 minutes. This softens it, making it easier to work with and conform to your cab's contours. Confirm the pre-molded carpet has marked bolt holes for easy alignment, especially around the front bench seat.
Before you lay down the carpet, route any amp and speaker wires along the transmission hump. This keeps everything organized and separate from the carpet installation, which is pretty much crucial for a clean look. After laying the carpet, check for any gaps. You can order chrome sill plates to cover these, adding a polished finish to your interior.
Here's a quick overview of essential steps:
| Step | Description |
|---|---|
| Soften Carpet | Lay it in the sun for 30 minutes |
| Align Bolt Holes | Focus on the front bench seat |
| Organize Wires | Route along the transmission hump |
| Cover Gaps | Use chrome sill plates |
| Final Fit Check | Confirm snug fit and polished appearance |
With these steps, your C10's interior will look fantastic!
Setting Up Electrical Wiring

When setting up your electrical wiring, choosing the right wiring kit is essential for ideal performance.
For a solid audio setup, make sure to follow installation tips for your subwoofers to avoid any issues down the line.
A well-planned approach won't only enhance sound quality but also keep everything organized and safe.
Wiring Kit Selection
Choosing the right wiring kit for your Chevrolet C10 is crucial for setting up a reliable and efficient electrical system. You're gonna go through several options, but prioritize high-quality brands like Kicker to guarantee safety and peak performance for your audio system.
A typical wiring kit should include essential components that protect your system while enhancing your overall setup.
Here's what to look for:
- A 100 amp fuse to prevent fire hazards
- Compatibility with your audio system's wattage
- Parallel wiring options for subwoofer connections
- Electrical tape for bundling and securing cables
Consider the specifics of your audio system when selecting a wiring kit. Make certain it meets your performance needs without overloading the system.
Running wiring in parallel helps achieve better sound output while keeping everything organized. After installation, use electrical tape to secure any loose cables, preventing tangles and guaranteeing a tidy appearance inside your classic truck.
Subwoofer Installation Tips
Setting up subwoofers in your Chevrolet C10 can greatly enhance your audio experience, but proper electrical wiring is key to achieving ideal performance. Start by installing a 500-watt JL Audio amp alongside two 10-inch Kicker Comp subs for really good sound. Use a high-quality Kicker wiring kit to guarantee safety and performance.
Here's a quick reference for your wiring setup:
| Component | Description | Purpose |
|---|---|---|
| JL Audio Amp | 500 watts, high-efficiency | Powers the subwoofers |
| Kicker Comp Subs | Two 10-inch units | Provides deep bass |
| 100 Amp Fuse | Safety feature for electrical setup | Prevents fire hazards |
| Electrical Tape | For securing wires | Maintains a tidy installation |
Run the wiring in parallel to connect the subs effectively. Don't forget to incorporate the 100 amp fuse to protect your audio system. Finally, organize the cables neatly with electrical tape to avoid interference with other components. Integrating the Kicker Comp sound system while keeping the original 1981 remanufactured grill will give your C10 an authentic look that complements the interior perfectly.
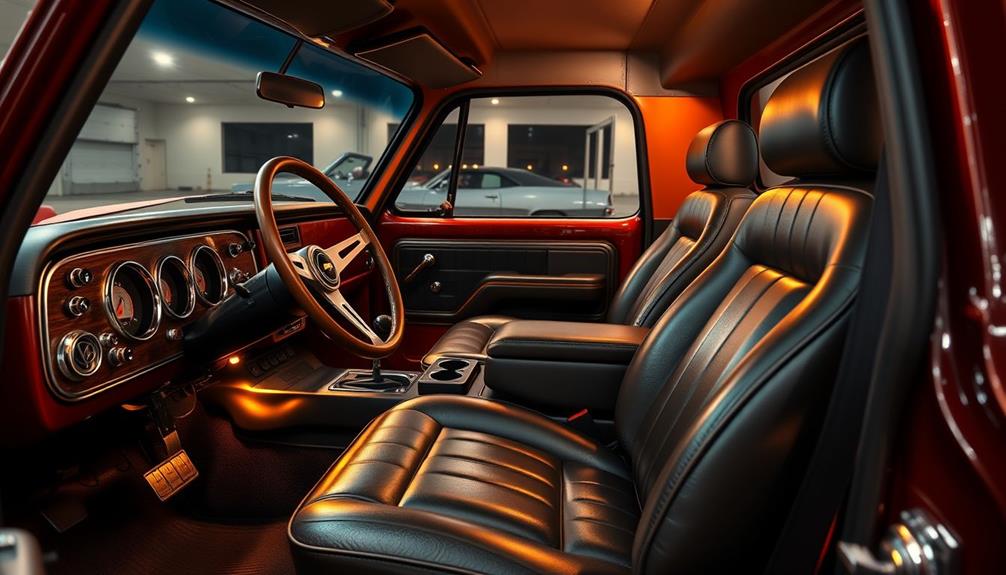
Finalizing Interior Components
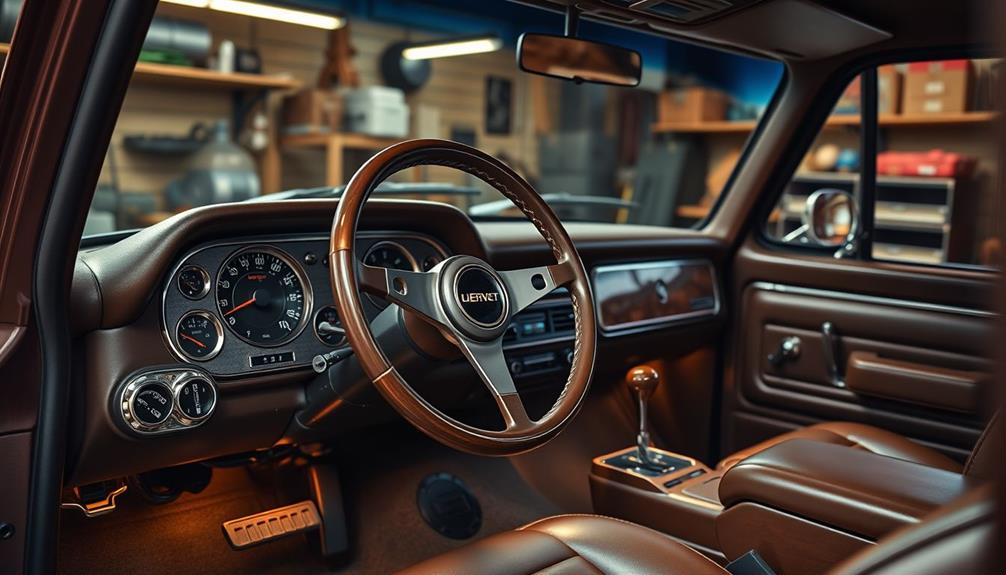
Finalizing the interior of your Chevrolet C10 is an exciting step that brings the project closer to completion. You're gonna want to focus on key components that will enhance both the look and feel of your classic truck.
Start by ensuring all your new door panels and carpet are custom-fitted to match the original contours of the cab. This attention to detail will make a significant difference.
Here are some essential final touches to reflect upon:
- Reupholstered bench seat from a local shop for that perfect fit.
- Chrome door seals for a polished finish that complements your interior design.
- Brushed aluminum foot pedals to enhance the aesthetic appeal and functionality.
- Chrome sill plates to cover gaps after laying new carpet, giving a completed look.
Also, make sure all electrical components, like your audio system, are neatly organized and secured. This not only contributes to the functionality but also keeps the overall cleanliness of your interior setup.
With these final touches, your Chevrolet C10 will be ready to hit the road in style!
Engaging With the Community

Connecting with the automotive community can greatly enhance your Chevrolet C10 restoration experience. Engaging on social media platforms can boost your visibility, as I've seen during my own restoration of a 1981 Chevy C10, where followers unexpectedly surged.
Sharing installation videos not only highlights your process but also offers valuable tips and product reviews that can help fellow enthusiasts tackle their projects. You might also find that sharing your journey can lead to discussions about various restoration techniques, akin to how juice diets may encourage individuals to seek out expert advice and share their experiences in achieving a balanced approach.
When you receive positive feedback, like the comments I got regarding sound quality improvements after installing sound deadeners, it fuels ongoing engagement. It encourages an environment of knowledge sharing among classic truck owners.
Actively participating in discussions and responding to viewer inquiries fosters a nurturing community spirit, promoting a culture of helping one another.
I'm also going to encourage you to document your experiences online. This not only inspires others to initiate their DIY journeys but also strengthens connections within the classic truck enthusiast community.
Engaging with others not only enhances your project but also enriches the shared passion for restoring these timeless vehicles. So, don't hesitate to immerse yourself in the community—your journey can inspire someone else!
Frequently Asked Questions
What Does the C in Chevy C10 Stand For?
The "C" in Chevy C10 stands for "Conventional." It signifies that this model is part of the conventional cab truck series, designed for versatility and robustness, appealing to both work and leisure enthusiasts.
Is the Chevy C10 a Classic?
Absolutely, you'll find the Chevy C10's classic charm captivates car enthusiasts. Its timeless design, dedicated following, and robust restoration market undeniably confirm its classic status, making it a beloved choice for collectors and customizers alike. Moreover, the Chevy C10’s enduring popularity has sparked a market for customizing these iconic trucks. Enthusiasts can now personalize their C10 with a range of aftermarket accessories, including Chevrolet logo custom badges, to truly make their vehicle stand out. Whether it’s adding unique touches or restoring to factory-original condition, the Chevy C10 offers endless opportunities for automotive creativity.
How Much Horsepower Does a 1969 Chevy C10 Have?
The horsepower of a 1969 Chevy C10 varies based on the engine. The base inline-six offers about 155 horsepower, while the V8 options can reach up to 325 horsepower, depending on your choice.
Is a Chevy C10 a Square Body?
Yes, the Chevy C10 is part of the Square Body generation, produced from 1973 to 1987. Its boxy design and rugged aesthetic make it a favorite among classic truck enthusiasts. You'll love its customizable features!
Conclusion
In summary, customizing the interior of your Chevrolet C10 not only enhances its appeal but also adds personal flair. Did you know that nearly 60% of classic truck owners opt for unique upholstery designs? Imagine transforming your ride into a one-of-a-kind masterpiece that reflects your style. With the right tools and community support, you can tackle upholstery, wiring, and more. So roll up your sleeves, jump in, and enjoy the satisfaction of creating your dream truck!