To fix the cylinder 4 combustion chamber quench, you should first inspect for wear, cracks, or displacement of the quench pads, then carefully remove and replace or reshape them for a snug fit. Ensuring proper sealing and surface finishing is key to restoring peak compression and heat transfer. Proper torque and sealing help reduce knocking and emissions. If you want to know more about effective techniques and tips, you’ll find valuable details below.
Key Takeaways
- Inspect and replace worn or cracked quench pads for proper sealing and combustion efficiency.
- Ensure mating surfaces are clean, smooth, and free of debris before reassembling.
- Use high-quality pads and confirm precise fitment to prevent leaks and hot spots.
- Properly torque components and verify sealing with compression and leak-down tests.
- Restoring the quench area improves power, reduces knocking, and enhances engine reliability.

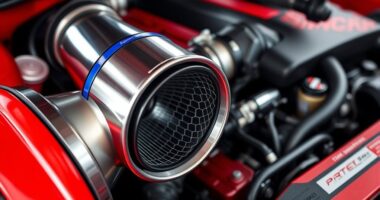
If you’re experiencing issues with Cylinder 4’s combustion chamber, a common culprit is the quench area not functioning properly. The quench area plays a critical role in controlling combustion efficiency and preventing knocking. When it’s compromised, you might notice decreased power, rough running, or increased emissions. The key to fixing this often lies in a proper quench pad modification and ensuring effective combustion chamber sealing. These adjustments can substantially improve performance and reliability.
Start by inspecting the existing quench pads. Over time, they can become worn, cracked, or displaced, which reduces their ability to seal the combustion chamber effectively. A well-executed quench pad modification involves replacing or reshaping these pads to ensure a tight seal. This process typically includes removing the cylinder head, thoroughly cleaning the mating surfaces, and installing high-quality, precision-cut pads that fit snugly against the piston crown and cylinder head. Proper fitment is essential—any gaps or uneven surfaces can allow hot gases to leak, causing knocking and reducing combustion efficiency.
Combustion chamber sealing is fundamental for maintaining consistent compression and preventing combustion gases from escaping. When the seal isn’t tight, it leads to loss of compression, which directly impacts power output and fuel economy. After replacing or modifying the quench pads, you should verify that the sealing surfaces are smooth, free of debris, and properly torqued to manufacturer specifications. Using a good sealing compound or gasket can also help guarantee a better seal, but the primary focus should be on the integrity of the quench pads and mating surfaces.
Another important step is to check the shape and thickness of the modified quench pads. They should be thin enough to allow for efficient heat transfer but thick enough to withstand combustion pressures. You might need to customize or select pads that match the specific dimensions of your engine’s combustion chamber. Properly sealing the chamber reduces hot spots and prevents pre-ignition, which can cause knocking and engine damage.
Additionally, utilizing the right oil for your engine components can help maintain optimal sealing and performance, especially after modifications. Once you’ve completed the quench pad modification and sealed the combustion chamber, it’s wise to run a compression test and perform a leak-down test. These tests confirm that the chamber is sealed properly and that the modifications have restored ideal compression. If done correctly, these steps will lead to improved combustion efficiency, reduced knocking, and better overall engine performance. Addressing the quench area with precise modifications ensures that Cylinder 4 operates smoothly, reliably, and at peak efficiency.
Frequently Asked Questions
Will This Fix Improve Overall Engine Performance?
You might see an improvement in your engine efficiency and fuel economy with this fix. By addressing combustion chamber issues, it helps optimize fuel burn and reduce waste. Better combustion means your engine runs smoother and uses fuel more effectively, which can lead to increased power and savings. While the fix targets specific problems, overall performance gains depend on your engine’s condition and how well other components are maintained.
Is the Modification Suitable for All Engine Types?
You’re wondering if this modification suits all engine types. It’s important to contemplate engine compatibility because not every engine benefits from the same fix. Some engines may have specific design limitations that prevent the modification from being effective or safe. Before applying it broadly, you should assess your engine’s unique features and consult manufacturer guidelines to avoid potential issues or damage caused by incompatible modifications.
How Long Does the Repair Process Typically Take?
Think of the repair process like a carefully choreographed dance—timing varies. Your repair timeline depends on process complexity, which can range from a quick fix to a more involved job. Typically, it takes a few hours for a straightforward fix, but if more parts need attention, it could stretch to a full day or more. Be prepared for some variability based on your engine’s specific condition.
Are There Any Potential Risks or Side Effects?
When considering potential risks or side effects, you should be aware of risk factors like improper installation or material incompatibility. These can lead to issues such as leaks or reduced engine performance. Side effect considerations include temporary increased emissions or minor engine vibrations. It’s important to follow all instructions carefully and consult with a professional to minimize these risks and guarantee a smooth, safe repair process.
What Tools and Parts Are Required for the Fix?
You might wonder what tools and parts you’ll need for this fix. It’s likely you’ll require diagnostic tools to identify the issue precisely and replacement parts like a new quench area or gasket. Ensuring you have the correct socket wrenches, screwdrivers, and possibly a torque wrench is essential. Double-check the specific parts needed for your engine model, so the repair goes smoothly and effectively, preventing future problems.
Conclusion
By making this small adjustment, you’re gently guiding your engine toward a smoother, more balanced performance. It’s like tending to a delicate garden—sometimes, a subtle touch makes all the difference. With this fix, you’re helping your cylinder 4 find its rhythm again, encouraging longevity and reliability. Remember, a little care goes a long way in keeping your engine happy and healthy, so enjoy the quiet confidence that comes with a job well done.

Alex is our go-to expert on performance tuning, with over a decade of experience in the automotive industry. His deep understanding of engine dynamics, exhaust systems, and performance software allows him to break down complex concepts into easy-to-follow guides. Whether you’re looking to boost horsepower or fine-tune your vehicle’s responsiveness, Alex’s insights will help you achieve peak performance.