
To install a cold air intake, start by preparing your vehicle—check compatibility, gather tools, and make sure the engine is cool. Then, remove the factory air intake system, disconnect sensors, and carefully take out the original setup. Next, fit the new intake assembly in place, secure all clamps and couplers, and reconnect sensors correctly. Finally, double-check everything for leaks or misaligned parts, test the system, and you’re good to go. Keep going to learn all the detailed steps involved.
Key Takeaways
- Prepare your vehicle by confirming compatibility, gathering tools, and disconnecting the battery with the engine cool.
- Remove the factory air intake system, including the air box, intake tubes, and sensors, following proper disassembly steps.
- Position and secure the new cold air intake assembly, ensuring proper alignment and clearance from engine components.
- Reconnect sensors, route wiring neatly, and double-check all clamps, couplers, and seals for leaks and secure fitment.
- Test the installation with a drive, listen for issues, and verify engine response and sensor operation before regular use.

EVIL ENERGY Cold Air Intake Compatible for 2011-2023 Chrysler 300/300C, for 2011-2023 Dodge Challenger/Charger 3.6L, No Cutting or Drilling Needed, Includes Heat Shield & Pre-Filter, Black
[Compatibility] – EVIL ENERGY cold air intake compatible for 2011-2023 Chrysler 300 3.6L, 2014-2015 Chrysler 300 C 3.6L,…
As an affiliate, we earn on qualifying purchases.
As an affiliate, we earn on qualifying purchases.
Preparing Your Vehicle for Installation

Before beginning the installation, you need to prepare your vehicle to guarantee a smooth and safe process. First, confirm that your vehicle is compatible with a cold air intake system. Decide on your performance goals—whether you want more horsepower or better fuel economy—to guide your choices. Check local laws to ensure vehicle modifications are legal in your area. Understanding the reasons for installing a cold air intake can help you prioritize your installation goals and ensure satisfaction with the upgrade. Gathering all necessary tools, including screwdrivers, wrenches, and any vehicle-specific equipment, along with the cold air intake kit and cleaning supplies, is essential for a successful installation. Make sure the engine is cool to prevent burns, then park on a level surface. Disconnect the negative battery terminal to avoid accidental starts, and support the hood securely. Clear the workspace for safety, and review your owner’s manual for specific instructions. Additionally, considering the benefits of improved airflow can motivate you to complete the installation thoroughly and correctly. Checking for any existing issues before starting can prevent complications during the process.
EVIL ENERGY Cold Air Intake Compatible for 2011-2023 Chrysler 300/300C, for 2011-2023 Dodge Challenger/Charger 3.6L, No Cutting or Drilling Needed, Includes Heat Shield & Pre-Filter, Black
[Compatibility] – EVIL ENERGY cold air intake compatible for 2011-2023 Chrysler 300 3.6L, 2014-2015 Chrysler 300 C 3.6L,…
As an affiliate, we earn on qualifying purchases.
As an affiliate, we earn on qualifying purchases.
Removing the Factory Air Intake System

To remove the factory air intake system, start by locating the air intake box, usually mounted near the front of the engine bay.
Identify the connected air filter housing and intake tubes leading to the throttle body.
Locate the air filter housing and intake tubes connected to the throttle body.
Remove any heat shields or covers blocking access.
Disconnect sensors like the MAF sensor attached to the intake.
Loosen hose clamps on intake tubes with a screwdriver or socket wrench, then detach the tubing from the throttle body and filter housing.
Unplug electrical connectors for sensors, and remove bolts or screws securing the intake parts.
Carefully separate the air filter housing from its mounting points.
Disconnect vacuum lines or breather hoses from the intake box, then lift out the entire assembly.
Keep all components organized for reinstallation or disposal.
Additionally, understanding the functionality of sound vibrations can help optimize your vehicle’s intake performance and overall health. Recognizing how sound vibrations influence engine airflow can lead to better tuning and efficiency.
RiAiCiING 4'' LS Swap Cold Air Intake Kit, Universal Fit, Compatible with LS1 LS2 LSX LQ4 LQ9 Restomod A-Body G-Body Camaro Chevelle GTO Monte Carlo Caprice
【Compatibility】Universal design. Fits most LS1 LS2 LS3 LQ4 LQ9 LY6 4.8 5.3 5.7 6.0 engines. Compatible with most…
As an affiliate, we earn on qualifying purchases.
As an affiliate, we earn on qualifying purchases.
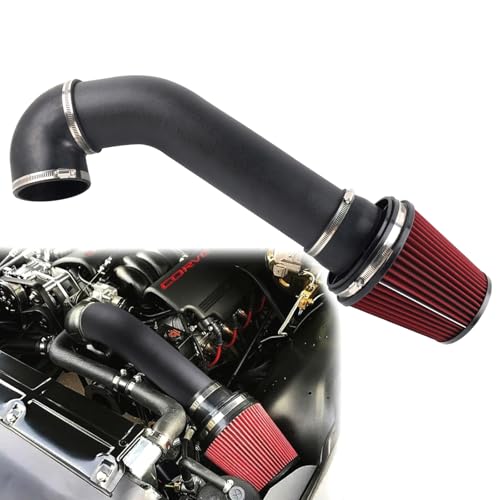
Installing the New Cold Air Intake Assembly

Begin by positioning the new airbox in its factory location, aligning it with the existing bolt holes. Secure it with the provided screws or bolts, avoiding the removal of the support bar unless absolutely necessary.
Make sure the airbox lines up with the throttle body to ensure proper airflow. Tighten the fasteners gradually to prevent cross-threading or misalignment.
Check that there’s enough clearance from engine components to prevent excessive heat transfer, which could affect performance. Additionally, ensuring proper installation techniques can help avoid future issues and optimize the system’s longevity.
Once the airbox is securely mounted, move on to connecting the intake tube. Ensure the couplers and clamps are properly seated and tightened with a socket wrench, not a screwdriver.
Verify the assembly sits flush and stable, ready for the next steps without any loose or misaligned parts.
Additionally, confirming that the intake system is properly airflow optimized can help enhance engine responsiveness and efficiency.

BOSCH 5607WS Workshop Engine Air Filter – Compatible with Select Mazda 3, 3 Sport, 6, CX-5
Bosch Workshop Engine Air Filters are constructed with a high number of pleats for robust particle holding capacity
As an affiliate, we earn on qualifying purchases.
As an affiliate, we earn on qualifying purchases.
Reconnecting Sensors and Final Checks

After installing the new cold air intake, it’s essential to reconnect all sensors correctly to guarantee your vehicle’s systems function properly. Make sure the mass air flow sensor is properly seated and securely connected to maintain accurate airflow readings. If you replaced or moved the intake air temperature sensor, ensure it’s fastened tightly and the wiring is connected correctly to avoid error codes or poor performance. Route sensor wires neatly to prevent damage and ensure easy access for future maintenance. Confirm that all electrical connectors are fully locked in place. Double-check sensor positioning for correct data transmission to the vehicle’s computer. Proper sensor connections are crucial for optimal engine management and performance, and incorrect wiring can lead to diagnostic trouble codes or decreased efficiency. Additionally, consulting your vehicle’s owner’s manual can help verify correct sensor placement and wiring specifications. Using proper installation techniques ensures the longevity and effectiveness of your cold air intake system. Finally, inspect the entire intake system for leaks, tighten clamps and couplers securely, and verify the air filter is properly seated.
Testing and Troubleshooting After Installation

Once you’ve completed the installation, it’s crucial to verify that everything functions correctly before hitting the road. Start by checking these key points:
After installation, verify everything works properly before heading out.
- Inspect fitment and leaks: Ensure the cold air intake is securely installed, all connections are tight, and there are no air leaks that could hinder performance. Proper fitment is essential for optimal airflow and power gains. Also, inspect the surrounding areas for any signs of improper sealing or loose clamps that could compromise performance.
- Verify sensor and temperature readings: Confirm sensors are connected properly, and measure intake air temperature to ensure it’s cooler than the stock setup. This helps in assessing the effectiveness of your modifications and ensures the engine’s sensors are functioning correctly.
- Test drive and observe: Drive under different conditions, listen for unusual sounds, and monitor engine response for smooth operation. Pay attention to any engine response changes that might indicate underlying issues.
If an engine light appears or performance feels off, troubleshoot air leaks, sensor issues, or misalignment. Address problems promptly to optimize your cold air intake’s benefits.
Frequently Asked Questions
Can I Install a Cold Air Intake Without Professional Help?
You can install a cold air intake yourself if you’re comfortable with basic mechanical tasks. The process involves removing your factory air intake, attaching the new kit, and ensuring all connections are tight and secure.
Use common tools like screwdrivers and wrenches, follow the instructions carefully, and take your time. Just be cautious with sensors and hoses to avoid damage, and work in a well-lit, ventilated space.
Will Installing a Cold Air Intake Void My Vehicle’S Warranty?
You’re wondering if installing a cold air intake will void your vehicle’s warranty. Generally, it won’t, especially if installed correctly and using reputable parts.
Manufacturers like Ford specify that aftermarket modifications, when properly done, don’t automatically void warranties. Just make sure the installation is professional and keeps within manufacturer guidelines.
Keep records of your installation, and remember, if the modification causes damage, that could impact your warranty coverage.
Do I Need to Reprogram or Tune My Car After Installation?
You might wonder if you need to reprogram or tune your car after installing a cold air intake. While some vehicles can run fine without tuning, most modern engines benefit from ECU adjustments to maximize performance and efficiency.
If you want the full benefits, consider a tune. It helps optimize airflow, improve power, and guarantee your engine runs safely and reliably with the new intake system.
Are Special Tools Required for Installing a Cold Air Intake?
You might wonder if you need special tools for installing a cold air intake. Usually, standard hand tools like screwdrivers, wrenches, and pliers are enough.
Some kits require Allen or Hex wrenches, but these are common and often included. Make sure to check the instructions beforehand.
How Often Should I Replace or Clean the Air Filter?
They say “an ounce of prevention is worth a pound of cure,” so staying on top of your air filter is key. You should replace or clean your engine air filter every 12,000 to 15,000 miles under normal driving.
If you drive in dusty areas or do stop-and-go city driving, check it more often. Regular inspections and maintenance boost your engine’s performance and fuel efficiency.
Conclusion
Now that you’ve installed your cold air intake, take a moment to enjoy the newfound roar of your engine—it’s like releasing a vintage race car in your driveway. Remember to double-check all connections and sensors before hitting the road. With patience and care, you’ve upgraded your ride and gained a little more power and efficiency. Just like tuning a classic, this upgrade brings a sense of pride and excitement that no magic potion can match.