To troubleshoot your emergency kit in minutes, start by inspecting the overall condition—check for signs of damage, moisture, or pests. Then, review expiration dates on food, water, and medicines, replacing expired items immediately. Test batteries in flashlights and electronics, swapping out weak or dead ones, and verify contact info for family and emergency services. Organize supplies for quick access, and restock any missing essentials. To guarantee your kit remains ready, follow these steps carefully—you’ll find more helpful tips ahead.
Key Takeaways
- Quickly verify the kit’s accessibility by ensuring it is stored in a designated, visible, and easily reachable location.
- Conduct a rapid visual inspection of supplies for expired items, leaks, or damage; replace or discard as needed.
- Test critical devices like flashlights and batteries to confirm they function properly; replace dead batteries immediately.
- Cross-check the kit against your emergency plan checklist to ensure all essential items are present and ready.
- Update contact information and record-keeping to ensure quick communication during an emergency.
Assess the Overall Condition of Your Kit

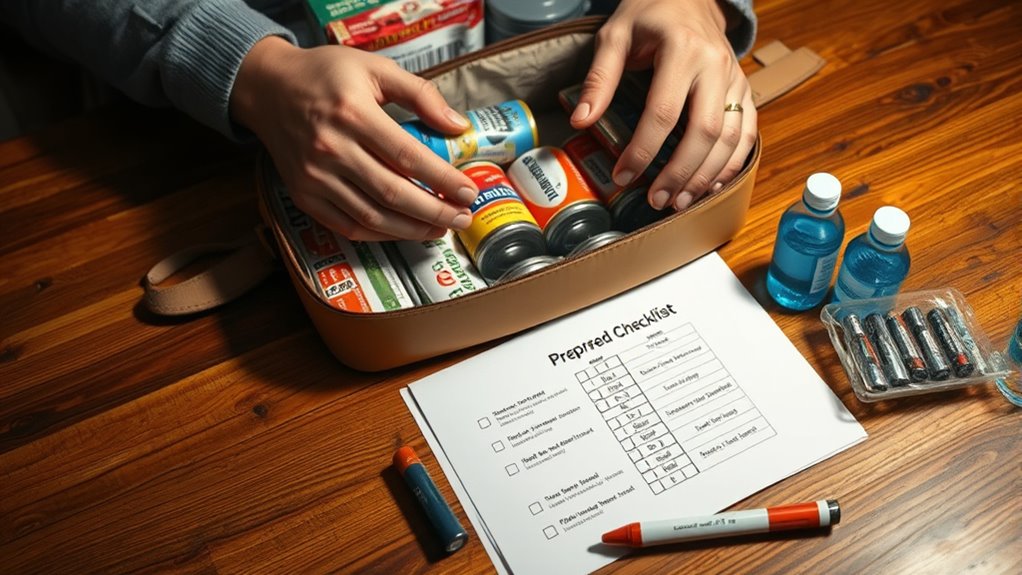
Before checking your emergency preparedness kit, it’s important to evaluate its overall condition. Start by inspecting how well it’s stored; proper storage organization keeps supplies accessible and protected from damage. Look for signs of wear, moisture, or pests that could compromise the contents. Consider kit customization—verify your kit still meets your current needs, such as adding extra supplies for family members or updating items for seasonal risks. Check if the container is sturdy and intact, and confirm that labels or tags are clear for quick identification. A well-organized and tailored kit helps you find essentials fast and ensures everything is in good shape. Regularly assessing these aspects keeps your emergency supplies reliable and ready for use when you need them most. Incorporating multi-functional furniture can also maximize storage space and make your kit more adaptable to changing needs.
Check for Expired Items and Replace Them
You should regularly check the expiration dates on all your emergency supplies to guarantee they’re still usable. Replace any expired items immediately to keep your kit effective. Keep your supplies in visible spots so you can quickly spot and swap out outdated items. Incorporating a well-organized workspace approach can also help you regularly monitor and maintain your emergency kit efficiently.
Inspect Expiration Dates Regularly
Regularly inspecting the expiration dates on your emergency supplies guarantees that everything remains safe and effective when you need it most. Start by checking food storage items, ensuring no canned or packaged foods have expired, which could compromise safety and nutrition. Don’t forget to review supplies related to water purification, such as filters or purification tablets, to make sure they’re still usable. Expired items can become less effective or unsafe, so replacing them promptly keeps your kit reliable. Keep a checklist to track expiration dates and set reminders for regular inspections. This simple step minimizes the risk of using compromised supplies during an emergency. Additionally, understanding the importance of proper storage conditions helps prolong the shelf life of your supplies and maintain their effectiveness. Staying proactive guarantees your kit remains ready, giving you peace of mind knowing your food storage and water purification supplies are always up to date.
Replace Outdated Supplies Promptly
Keeping your emergency supplies up to date means promptly replacing any expired items. Check your storage containers regularly for items past their expiration dates. Expired supplies, like food, water, or medications, can be ineffective or unsafe during an emergency. Implement a supply rotation system to ensure fresh items are always available. When you find expired goods, discard them and replace them immediately with new stock. Use clear, labeled storage containers to keep track of expiration dates easily. Regularly reviewing and updating your kit prevents waste and guarantees readiness. Staying vigilant about outdated supplies minimizes risks and guarantees your kit remains reliable when you need it most. Prioritize quick replacements to maintain a well-stocked, functional emergency preparedness kit. Incorporating Glycolic Acid into your skincare routine can improve skin texture and overall health, ensuring you look and feel prepared for any situation.
Store Items in Visible Locations
Storing emergency supplies in visible locations makes it easier to spot expired items and know exactly what needs replacing. Use clear storage containers and a consistent labeling system so you can quickly identify contents and expiration dates. Regularly check your supplies, especially those in easily accessible spots. Incorporating proper storage techniques can further preserve the quality and effectiveness of your supplies.
Verify Contents Against Your Emergency Plan

Before using your emergency kit, you should compare its contents with your emergency plan to make sure everything needed is present. Check your storage organization to verify all items are in their designated spots, making verification quicker. Review your kit customization to confirm it includes essentials tailored to your family’s specific needs, like medications or special supplies. Cross-reference the items in your kit with your emergency plan’s checklist to identify any missing or outdated supplies. This step helps prevent surprises during an emergency. Keep your kit updated and well-organized so you can easily validate that everything aligns with your preparedness strategy. Regularly practicing your creative practice techniques can also help you stay calm and resourceful in high-pressure situations. Doing this regularly ensures your kit remains complete, functional, and ready to support you when you need it most.
Ensure Essential Items Are Easily Accessible
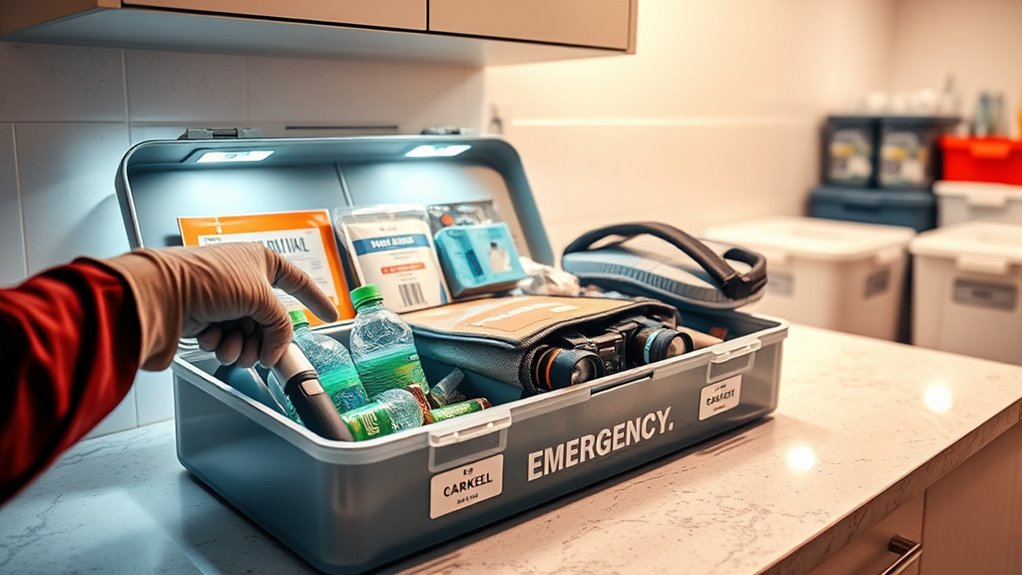
Are you confident that your emergency kit’s most critical items are easy to grab quickly? Ensuring accessibility starts with smart storage solutions. First, organize items in clearly labeled containers or compartments so you can find them instantly. Second, place your kit in a designated, easily reachable spot, like near an exit or in a closet. Third, regularly assess your setup to identify any accessibility issues and make improvements. Accessibility improvement isn’t just about location; it’s about making sure items are visible and simple to retrieve. By streamlining storage solutions and maintaining a consistent position for essential items, you’ll save precious seconds during an emergency. Regularly review your setup to ensure all items are accessible and in working order, which is crucial for effective emergency response. Remember, quick access can make a significant difference in your safety and response time.
Test Batteries and Replace as Needed
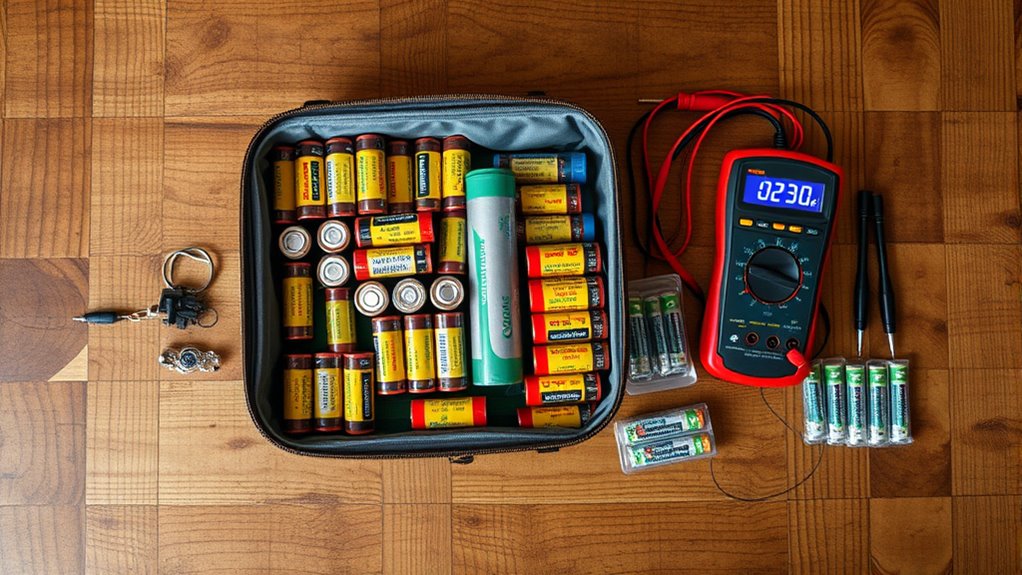
Regularly testing your batteries guarantees your emergency devices will work when you need them most. Check each battery’s lifespan by inspecting for corrosion, leaks, or deterioration. Use a battery tester to verify they hold a proper charge, following the recommended charging protocols. Batteries can lose power over time, even if they aren’t used, so it’s essential to replace those nearing the end of their lifespan. When testing, don’t rely solely on visual cues; perform functional tests if possible. Keep a record of test dates and replacements to track battery health. If a battery shows signs of weakness or fails to power devices properly, replace it immediately. Regular testing and timely replacements ensure your emergency kit remains reliable when it’s needed most. Monitoring battery health is key to maintaining your kit’s readiness and safety.
Confirm Proper Functioning of Flashlights and Devices

Make sure your flashlights and devices are working by checking their batteries and replacing any that are weak or dead. Test each device to confirm it powers on properly and functions as expected. Following simple battery check procedures and testing tips helps guarantee you’re prepared when you need them most. Additionally, verifying the security system’s components ensures your home security measures are fully operational in case of an emergency.
Battery Check Procedures
Have you tested your flashlights and devices recently to verify they’re working properly? Performing a quick battery check ensures they’ll function when needed. First, inspect for battery corrosion around contacts, which can hinder performance. Second, conduct voltage testing with a multimeter to confirm batteries still hold a proper charge; replace any that show low voltage. Third, clean corroded terminals gently with a cloth or a baking soda solution to improve contact. Regularly checking batteries prevents surprises during emergencies and extends your devices’ lifespan. Additionally, proper storage of batteries in a cool, dry place can help maintain optimal performance over time. Remember, batteries can sometimes appear fine but still lack power, so testing voltage is essential. Keeping your batteries in good shape guarantees your flashlights and devices are ready to serve when it counts most.
Device Testing Tips
Ensuring your flashlights and devices work properly is essential for effective emergency preparedness. Start by testing each device to confirm proper functioning, paying attention to device calibration. For flashlights, insert fresh batteries, turn them on, and check brightness and beam focus. For electronic devices, verify they power on correctly and are compatible with your current battery types. Confirm electronic compatibility by inspecting connectors, ports, and battery contacts for corrosion or damage. If a device isn’t functioning, recalibrate if applicable, or replace batteries and components as needed. Regular testing helps identify issues early, preventing failures during emergencies. Keep detailed records of test results and maintenance actions. Proper device calibration ensures accuracy, while verifying electronic compatibility guarantees your devices will perform reliably when needed most. Automation technology can also aid in streamlining and monitoring device testing procedures, enhancing overall preparedness.
Update Contact Information and Emergency Contacts

Keeping your contact information and emergency contacts up to date is essential for effective communication during a crisis. Regular contact updates ensure that emergency contacts are reachable and accurate, reducing confusion when every second counts. To maintain this, consider these steps:
- Review and verify all emergency contacts periodically, especially after changing jobs, phone numbers, or addresses.
- Store multiple contact options, like email and secondary phone numbers, to ensure connectivity.
- Share updated contact information with family, friends, and emergency services to guarantee everyone stays informed.
Organize Items for Quick Grab-and-Go Access

To guarantee you can grab what you need quickly during an emergency, designate easy access zones in your kit area. Use clear, labeled containers to keep items organized and identify them at a glance. This setup helps you save precious time when seconds matter most. Incorporating body awareness techniques can also help you stay calm and focused when retrieving your supplies.
Designate Easy Access Zones
Organizing your emergency preparedness kit into designated easy access zones guarantees that essential items are quick to find when seconds matter. Start by choosing strategic storage options, such as shelves or bins near exits, to streamline access. Use clear labeling techniques to identify zones for specific items, like first aid or food supplies, so you can locate what you need instantly. Consider these key steps:
- Assign specific zones for critical items to minimize search time during emergencies.
- Use consistent labeling techniques to ensure clarity and avoid confusion.
- Arrange items within zones logically, placing frequently used supplies at the front for quick grab-and-go access.
- Incorporate color coding to further enhance visual differentiation and speed up item retrieval.
This setup reduces chaos, saves valuable time, and ensures your kit is ready when every second counts.
Use Clear, Labeled Containers
Using clear, labeled containers makes it easy to identify and access essential emergency supplies quickly. When you prioritize labeling accuracy, you guarantee you can find what you need without wasting time. Use durable containers that can withstand rough handling and environmental factors to keep supplies protected. Clear containers let you see contents instantly, while labels provide specific details, reducing confusion during stressful situations. Choose containers made from sturdy materials to prevent cracking or leaks, especially if you need to move or store them in different locations. Regularly check labels for accuracy and update them if you add or remove items. This organization method streamlines your grab-and-go process, helping you respond faster and more efficiently during emergencies. Ensuring your organization complies with regulations for affiliate marketing disclosures can help maintain transparency if you share your kit setup online.
Review and Restock Non-Perishable Supplies
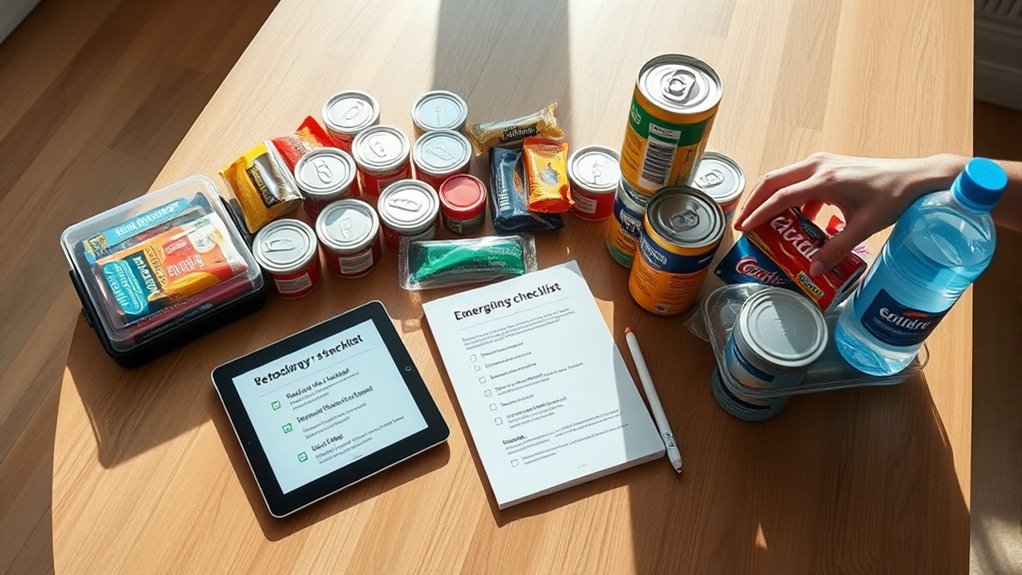
When was the last time you checked your non-perishable supplies? Regularly reviewing them guarantees food durability and proper storage solutions. Start by inspecting expiration dates and discarding expired items. Then, restock essentials that are running low. Consider these key points:
- Verify expiration dates and replace outdated products to maintain food safety.
- Organize supplies with clear, labeled containers for quick access during emergencies.
- Rotate stock by using items before they expire and replenishing with fresh supplies.
Keeping your emergency kit current is essential. Restocking isn’t just about replacing items—it’s about ensuring your supplies remain reliable when needed most. Proper storage solutions and regular checks help you stay prepared without unnecessary stress or last-minute scrambling.
Document Changes and Schedule Regular Checks

Keeping your emergency preparedness kit effective requires more than just initial setup; it’s crucial to document any changes you make and establish a schedule for regular checks. Start by tracking inventory management, noting when supplies are added, used, or expired. Consistent documentation updates help you stay organized and ensure nothing gets overlooked. Set a schedule—monthly or quarterly—to review your kit, verify the condition of items, and update records accordingly. This routine prevents outdated supplies from remaining in your kit and helps you identify gaps or shortages early. Keeping detailed records also makes it easier to troubleshoot issues quickly, as you’ll have a clear history of changes and maintenance. Regular checks and thorough documentation ultimately keep your emergency kit reliable and ready when you need it most. Additionally, understanding how to status your supplies can improve your overall preparedness and response time.
Frequently Asked Questions
How Often Should I Perform a Full Emergency Kit Check?
You should perform a full emergency kit check at least twice a year. During these inspections, review your storage organization to make certain everything is accessible and in its proper place. Check kit maintenance by testing batteries, replacing expired items, and updating supplies. Regularly maintaining your kit helps you stay prepared, making it easier to troubleshoot quickly during an emergency. Set reminders to stay consistent with these vital checks.
What Signs Indicate My Emergency Supplies Are No Longer Usable?
Did you know that over 60% of emergency supplies become unusable without proper inspection? If your supplies emit a foul or unusual scent, it’s a clear sign they’re compromised. During container inspection, look for corrosion, leaks, or damaged seals. If items are expired, discolored, or smell off, replace them immediately. Regularly check your kit’s scent detection and container integrity to make sure your supplies are ready when you need them most.
How Can I Customize My Kit for Specific Emergencies?
To customize your kit for specific emergencies, focus on personalized safety needs. You can add items like masks and gloves for health crises, or water purification tablets for natural disasters. Consider your local risks and your family’s unique needs, then tailor your kit accordingly. Regularly review and update it to make sure it remains relevant. Kit customization helps you respond more effectively, giving you confidence and peace of mind during any emergency.
What Are Quick Indicators of Expired or Spoiled Items?
Like a ticking clock, expired or spoiled items in your kit signal trouble. Check the expiration date on food, water, and medicines—if it’s past, discard them. Inspect packaging integrity; swollen, leaking, or damaged containers indicate spoilage. If items look off or smell strange, trust your nose and eyes. Regularly reviewing these indicators guarantees your kit stays reliable and ready for any emergency, giving you peace of mind when it matters most.
How Do I Train Family Members to Use the Kit Efficiently?
You should conduct family demonstrations and practice drills regularly to train your family members to use the kit efficiently. Show them how to access essential items quickly, explain each component’s purpose, and practice scenarios together. Encourage questions and hands-on participation to build confidence. Repeating these drills guarantees everyone knows what to do during an emergency, making your preparedness more effective and your responses faster when it matters most.
Conclusion
By regularly checking your emergency kit, you’re forging a shield of readiness that stands tall against chaos. Think of it as tending a garden—you must prune, water, and nurture it to keep it thriving. With each quick inspection, you ensure your safety treasure chest is stocked, accessible, and prepared for any storm. Stay vigilant, stay prepared, and turn your kit into a fortress ready to protect what matters most when time matters most.